TPP AMZTPP
From SPCTools
| Revision as of 21:50, 11 April 2012 JoeS (Talk | contribs) (→Step 5: Use the AWS Management Console) ← Previous diff |
Revision as of 21:57, 11 April 2012 JoeS (Talk | contribs) (→Step 3: Check on the status of your search) Next diff → |
||
| Line 197: | Line 197: | ||
| C:\Inetpub\wwwroot\ISB\data\demoAMZTPP amztpp status | C:\Inetpub\wwwroot\ISB\data\demoAMZTPP amztpp status | ||
| + | |||
| + | The results should look something like: | ||
| + | |||
| + | [[Image:AMZTPP_Status.jpg]] | ||
| ==== Step 4: Launch more searches ==== | ==== Step 4: Launch more searches ==== | ||
Revision as of 21:57, 11 April 2012
AMZTPP is a program developed by the trans-proteomic pipeline team for utilizing cloud computing (specifically Amazon Web Services) to execute multiple different peptide identification programs in parallel on MS/MS data. It can be used to cost effectively analyze large data sets in a short period of time.
Contents |
Installing amztpp
The latest version of the TPP cloud tool amztpp can be downloaded from the TPP sourceforge site at http://sourceforge.net/projects/sashimi/files/amztpp. It is packaged as a gzipped "tar" file and can be unpacked using the standard unix tool tar or on Windows using programs such as 7-zip, WinZip, Stuffit, WinRAR, etc..
Prerequisites
Since the amztpp tool is written in Perl you therefore need to install Perl on you system before proceeding. If you are on Linux it is very likely that you already have Perl installed on your system. If you are Windows you can download and install the free community edition provided by ActiveState at http://www.activestate.com/activeperl/downloads. (ActivePerl 5.14.2 or greater is required).
Ironically TPP is not required in order to use the amztpp tool nor do you need to have any of the open source MS/MS identification programs that it uses installed. Though you will find having TPP installed will make it much easier to view and interact with the results produced by amztpp. So its our recommendation that you first install TPP before proceeding following the instructions at Software:TPP.
Installing amztpp on Linux
First download the latest version from sourceforge if you haven't already and unpack the archive:
% wget sashimi/files/amztpp/amztpp-latest.tgz
% tar xvzf amztpp-latest.tgz
% cd amztpp-2.0
There are several ways to proceed from this point. The simplest is to follow the "standard" way of installing perl modules and programs as follows:
% perl Makefile.PL
Checking if your kit is complete...
Looks good
Writing Makefile for AMZTPP
Writing MYMETA.yml and MYMETA.json
If you get one or messages like Warning: prerequisite VM::EC2 1.09 not found. this indicates that you'll have to install additional modules for amztpp to work. As before there is a couple of different ways to install them. The easiest is to use CPAN. You can run the CPAN commands manually or there's a convenient rule written in the Makefile called installdeps that will do this for you (you'll likely need root privileges to execute this):
% make installdeps
Attempting to install prerequisites using cpan
...
Note that if this is the first time you've installed CPAN modules on your system you may be prompted with a series of questions. Simply accept the defaults for these questions. Another alternative to using CPAN is to use your Linux distributor's package manager. For example, using Ubuntu you'd run commands like "apt-get install libamazon-sqs-s3-perl". See your distributions manual for more details.
The next step is to build and test the program:
% make
% make test
A number of tests are skipped by default as they require you to provide your Amazon Credentials and the tests themselves will incur some minor AWS charges. If you want to run the full test set see the section on how to provide your AWS credentials and set these before running the tests.
The final step is to install the program with the command (again likely you'll need root privileges to execute this):
% make install
And that's it. You should now be ready to run amztpp. If you'd like to try it out jump down to the tutorial section to learn more.
If you want to change the installation location of amztpp from the default to, say, where you have TPP installed on you system you can use the PREFIX variable when you build the Makefile as so:
% perl Makefile.PL PREFIX=/opt/tpp |
Installing amztpp on Windows
The process for installing on Windows is similar to the process on Linux. After downloading and installing ActiveState's perl download the amztpp archive and unpack it. Next open up a Windows "command" window by clicking on the start icon and typing "cmd" in the "Search for programs and files" field. When the command window opens up change to the directory ("cd") that you unpacked the archive to and make sure dmake is installed:
C:\AMZTPP-2.0>ppm install dmake
C:\AMZTPP-2.0>dmake
Now setup for the build using the same command as with Linux:
C:\AMZTPP-2.0>perl Makefile.PL
Set up gcc environment - 4.5.2
Writing Makefile for AMZTPP
Writing MYMETA.yml
C:\AMZTPP-2.0>
You'll likely see some messages warning about missing perl modules that are required. You can run the following command to the build to use ActiveState's ppm installer to install the dependencies:
C:\AMZTPP-2.0>dmake installdeps
The next step is to test the program:
C:\AMZTPP-2.0>dmake test
A number of tests are skipped by default as they require you to provide your Amazon Credentials and the tests themselves will incur some minor AWS charges. If you want to run the full test set see the section on how to provide your AWS credentials and set these before running the tests.
Lastly install the program with:
C:\AMZTPP-2.0\dmake install
Troubleshooting
If you run into problems with the installation here are some good references on how to install perl modules:
- http://cpan.perl.org/modules/INSTALL.html
- http://www.perlmonks.org/index.pl?node_id=128077
- http://perl.jonallen.info/writing/articles/install-perl-modules-without-root
- http://www.activestate.com/blog/2010/10/how-install-cpan-modules-activeperl
Setting up your Amazon Credentials
Almost all of AMZTPP's operations require you to provide credentials to Amazon Web Services to confirm that you are who you say you are and that you do have permissions to do what you are trying to do. These credentials are know as Amazon's access and secret key. These keys are used to make secure REST or Query protocol requests to any AWS service API and are created automatically for you when your account is created.
You can look up what these values are on your Amazon Security Credentials page. Your access key and secret key are displayed under the Access Keys tab in the Credentials Section of the page.
There are a couple of different ways to provide these keys when running the amztpp command outlined in the next three sections.
Using command line options
You can use the command line options --access-key and --secret-key options each time you invoke a command. This can quickly become onerous. It also carries a degree of risk as your command line history will contain your access and secret keys and other users may be able to see the command you are running.
Using environment variables
By setting environment variables EC2_ACCESS_KEY and EC2_SECRET_KEY (and optionally EC2_REGION). For Linux (bash shell) use the following commands:
export EC2_ACCESS_KEY='your_access_key'
export EC2_SECRET_KEY='your_secret_key'
For Linux (csh shell) use the following commands:
setenv EC2_ACCESS_KEY 'your_access_key'
setenv EC2_SECRET_KEY 'your_secret_key'
For Windows users try the following commands in a cmd shell:
C:\> SET EC2_ACCESS_KEY=your_access_key
C:\> SET EC2_SECRET_KEY=your_secret_key
You'll have to set these each time you log in or open a command shell unless you setup your login to run these commands. If so please take the appropriate precautions to protect your keys.
Using a secret file
The last and most convenient (but also comes with some risk) is by putting your keys in a .awssecret file. The amztpp program contains two commands "save" and "delete" to make it easy to do this. To save your keys you can run the command (on linux or windows):
amztpp --access-key=your_access_key --secret-key=your_secret_key save
You can also do this manually on Linux with the commands:
C:\>echo your_access_key> %LocalAppData%\.awssecret
C:\>echo your_secret_key>> %LocalAppData%\.awssecret
and on Linux you would run:
% echo 'your_access_key' > ~/.awssecret
% echo 'your_secret_key' >> ~/.awssecret
% echo chmod 600 ~/.awssecret
If you use this mechanism always make sure you keep the permissions of this file strict so other users can't read it and never share it with anyone.
Checking your Amazon Credentials
The easiest way to test to see if you have your Amazon credentials set correctly is to simply check the status of amztpp via the status command as so:
amztpp status
If you've correctly setup your access keys a report should be generated showing the background process is stopped and no instances, messages or files in AWS.
Windows Tutorial for amztpp
This tutorial will walk you through the steps of executing a MS/MS searches on the cloud using amztpp.
Step 1: Download and install the test data and database
For this tutorial we'll be using the same dataset used by the TPP tutorial. This is a SILAC-labeled Yeast dataset comprised of 2 runs on a high mass-accuracy Orbitrap instrument, along with a Yeast database appended with decoys. We also include a parameters files for inspect, tandem, myrimatch and omssa for MS/MS identification. You can install it by:
- Downloading the mzML files, parameter files and database from Sourceforge (806Mb).
- Unpack the demo archive using 7zip, Stuffit, unzip or a similar program and set the destination directory to be C:\Inetpub\wwwroot\ISB\data
If you've successfully installed the demo set you should have a new folder at C:\Inetpub\wwwroot\ISB\data\demoAMZTPP
Step 2: Submit a X!Tandem search of the data to the AWS cloud
To submit searches, you need to use the Window's command line to invoke the program (often called the command shell).
- First open a new Windows command shell. How to do this varies by the version of your operating system (Windows XP, Windows Vista, Windows 7) but generally you want to go to the start menu and type "cmd" as the program to execute.
- Change to the demo directory from the first step using the cd command in the command window by typing:
C:\>cd \Inetpub\wwwroot\ISB\data\demoAMZTPP
- Now submit tandem searches of the two MS/MS runs to the cloud and direct that the output will be written to the folder 'tandem':
C:\Inetpub\wwwroot\ISB\data\demoAMZTPP>amztpp tandem OR20080317_S_SILAC-LH_1-1_01.mzML OR20080320_S_SILAC-LH_1-1_11.mzML OR20080317_S_SILAC-LH_1-1_01.mzML OR20080320_S_SILAC-LH_1-1_11.mzML -o tandem
- Lastly start the AMZTPP service to manage the uploading/downloading of files and launching EC2 nodes.
C:\Inetpub\wwwroot\ISB\data\demoAMZTPP>amztpp start
Assuming no errors the AMZTPP service should now be uploading files (in parallel) to the Amazon Cloud. Once the files are uploading the service will then launch one or more EC2 nodes to execute tandem on the files. When the results are ready, the service will download them to the folder named "tandem".
Step 3: Check on the status of your search
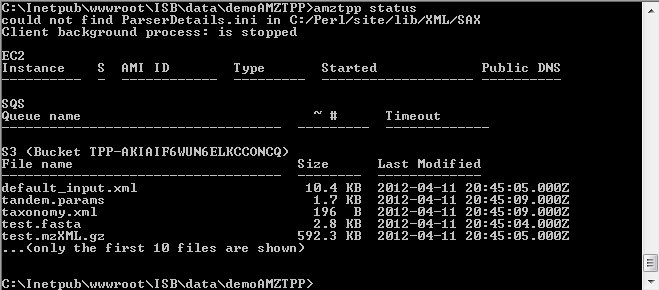
The amztpp command line program has a "status" command that will output details such as whether the background process is running, the EC2 instances launched and their state, the approximate number of messages in the upload, download and services queues in SQS and a list of some of the files currently stored in S3. To invoke the command run:
C:\Inetpub\wwwroot\ISB\data\demoAMZTPP amztpp status
The results should look something like:
Step 4: Launch more searches
Now launch more searches using the OMSSA, Myrimatch, and InsPect search engines with the following commands. Only the new parameter files will be uploaded to the cloud, as the two mzML files and database files already having been uploaded with the X!Tandem search.
C:\Inetpub\wwwroot\ISB\data\demoAMZTPP>amztpp omssa OR20080317_S_SILAC-LH_1-1_01.mzML OR20080320_S_SILAC-LH_1-1_11.mzML OR20080317_S_SILAC-LH_1-1_01.mzML OR20080320_S_SILAC-LH_1-1_11.mzML -o omssa
C:\Inetpub\wwwroot\ISB\data\demoAMZTPP>amztpp inspect OR20080317_S_SILAC-LH_1-1_01.mzML OR20080320_S_SILAC-LH_1-1_11.mzML OR20080317_S_SILAC-LH_1-1_01.mzML OR20080320_S_SILAC-LH_1-1_11.mzML -o inspect
C:\Inetpub\wwwroot\ISB\data\demoAMZTPP>amztpp myrimatch OR20080317_S_SILAC-LH_1-1_01.mzML OR20080320_S_SILAC-LH_1-1_11.mzML OR20080317_S_SILAC-LH_1-1_01.mzML OR20080320_S_SILAC-LH_1-1_11.mzML -o myrimatch
When finished the search results will be available in the corresponding omssa, inspect and myrimatch folders.
Step 5: Use the AWS Management Console
The Amazon Web Services management console is a simple and intuitive web-based user interface to all of Amazon's cloud resources. It can be used to also check on the status of your searches or when things go wrong it can be used to stop services or delete stored data to avoid running up large AWS charges.
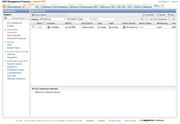
Start first by checking on the running nodes using the AWS Management Console. Using your web browser go to AWS Management Console and enter your Amazon username and password. You should then be presented with a screen showing details of your EC2 instances (assuming your searches are still going). For each instance details such as the state, type of instance, public DNS are shown. From this page you can also control your instances by selecting one or more instances and then choosing an operation (such as terminate).
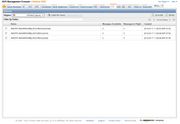
Next check on the status of the message queues by clicking on the SQS tab in the console. The Simple Queue Services (SQS) is a basic messaging system with different queues for sending and receiving messages. The amztpp program uses three such queues (upload, service, and download) to manage the communication between your client computer and the cloud services. When you submit a search an upload message is queued with the details of the files and parameters to use. The background service retrieves this message and uploads the files to S3 and then queues a message in the services queue. EC2 instances retrieve these messages and execute the search program on the uploaded files. The results are then submitted in another message in the download queue so that the background service on your computer and be notified to retrieve them from S3.
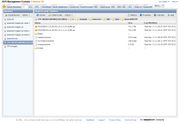
Lastly to see what files are being stored in S3 click on the S3 tab in the console. Files in S3 are stored in "buckets" which have to be unique across all AWS accounts. The amztpp program creates a bucket called TPP-<Amazon user id> for storing files. Click on the bucket to see its contents in the management console. Using this interface you can navigate the files stored in S3 and perform many of the common file operations such as adding, deleting, or changing permissions. You can also view the search logs through this interface as when a EC2 instance shuts down the log files are stored under in the folder /var/log.
Where to Get Help
The SPC Tools Discussion Group: spctools-discuss.googlegroups.com


