TPP:Using Petunia
From SPCTools
(Difference between revisions)
| Revision as of 21:19, 29 February 2008 Luis (Talk | contribs) (→How to change the location of the data files) ← Previous diff |
Current revision Luis (Talk | contribs) (→Accessing Petunia (Windows)) |
||
| Line 1: | Line 1: | ||
| == First Step == | == First Step == | ||
| - | ===[[TPP:Windows Cygwin Installation|Installing the TPP on Windows]]=== | + | ===[[Windows_Installation_Guide|Installing the TPP on Windows]]=== |
| == Customizing Petunia == | == Customizing Petunia == | ||
| Line 10: | Line 10: | ||
| * The new account is now ready; log in through Petunia with the 'guest' password. | * The new account is now ready; log in through Petunia with the 'guest' password. | ||
| * '''Once you log in, go to the Manage My Account tab in Petunia to change the password!'''. | * '''Once you log in, go to the Manage My Account tab in Petunia to change the password!'''. | ||
| + | |||
| + | |||
| + | ---- | ||
| + | === How to disable the 'guest' account === | ||
| + | * '''Make sure you have other accounts active before deleting the guest account from your system.''' | ||
| + | * Using Windows File Explorer (i.e. My Computer...), navigate to the location of the installation of the TPP tools, typically this is under '''C:\Inetpub\tpp-bin\'''. | ||
| + | * Locate the '''users''' folder, and navigate into it. | ||
| + | * Delete (or rename) the directory named '''guest'''. | ||
| + | |||
| + | |||
| ---- | ---- | ||
| === How to change the location of the data files === | === How to change the location of the data files === | ||
| ''Note: if using a removable or network drive, you will need to ensure that the drive is always mounted as the same letter.'' | ''Note: if using a removable or network drive, you will need to ensure that the drive is always mounted as the same letter.'' | ||
| * First, make sure that the Apache webserver is able to serve content from the new data folder. | * First, make sure that the Apache webserver is able to serve content from the new data folder. | ||
| - | ** Find the '''httpd.conf''' file; typically under '''C:\cygwin\etc\apache2\''' | + | ** Find the '''httpd.conf''' file; typically under '''C:\Program Files\Apache Software Foundation\Apache2.2\conf\''' |
| ** Make a copy of this file and keep it as a backup, in case you need to revert to it. | ** Make a copy of this file and keep it as a backup, in case you need to revert to it. | ||
| ** Open the file in your favorite text editor (i.e. Wordpad), and scroll to near the end. | ** Open the file in your favorite text editor (i.e. Wordpad), and scroll to near the end. | ||
| - | *** Find the line that reads '''<Directory "/cygdrive/c/Inetpub/wwwroot/ISB/">'''. | + | *** Find the line that reads '''<Alias /ISB "C:/Inetpub/wwwroot/ISB">'''. |
| - | **** Copy and paste all text starting on this line, down to and including the first line that only contains '''</Directory>'''. | + | **** Change the directory path within the quotes to the new location. |
| - | **** On the newly-pasted block of text, change the directory location within the <Directory...> tag to the new data location: | + | *** Find the line that reads '''<Alias /schema "C:/Inetpub/wwwroot/schema">''', and change as above. |
| - | **** Please note that this has to follow the cygwin-style path. For example, if your data is under E:\Proteomics\Data\TPP_data\, you would change the Directory line to read: '''<Directory "/cygdrive/e/Proteomics/Data/TPP_data/">'''. (Note the forward slashes and case-sensitivity) | + | *** Finally, find the line that reads '''<Directory "C:/Inetpub/wwwroot">''', and change as well. |
| - | *** Find the line that reads '''SetEnv WEBSERVER_ROOT /cygdrive/c/Inetpub/wwwroot/'''. | + | *** Please make note of the forward slashes and case-sensitivity when making these changes, and don't forget the quotes! |
| - | **** Change the directory location as above. | + | *** Also, make sure you copy everything from the original location (i.e. everything under C:/Inetpub/wwwroot) to new new data directory. |
| ** Save the modified file, and restart Apache for the changes to take effect. | ** Save the modified file, and restart Apache for the changes to take effect. | ||
| * Second, modify the Petunia code to point to the new data location: | * Second, modify the Petunia code to point to the new data location: | ||
| ** You can usually find the Petunia code under '''C:\Inetpub\tpp-bin\tpp_gui.pl'''. | ** You can usually find the Petunia code under '''C:\Inetpub\tpp-bin\tpp_gui.pl'''. | ||
| ** Open this file with your favorite text editor, and modify the following 2 lines: | ** Open this file with your favorite text editor, and modify the following 2 lines: | ||
| - | my $www_root = "/cygdrive/c/Inetpub/wwwroot/"; # full path to web server root | + | my $www_root = "C:/Inetpub/wwwroot/"; # full path to web server root |
| my $data_dir = "${www_root}ISB/data/"; # full path to data directory top-level | my $data_dir = "${www_root}ISB/data/"; # full path to data directory top-level | ||
| to reflect the new location. For example: | to reflect the new location. For example: | ||
| - | my $www_root = "'''/cygdrive/e/Proteomics/'''"; # full path to web server root | + | my $www_root = "'''E:/Proteomics/wwwroot/'''"; # full path to web server root |
| my $data_dir = "${www_root}'''Data/TPP_data/'''"; # full path to data directory top-level | my $data_dir = "${www_root}'''Data/TPP_data/'''"; # full path to data directory top-level | ||
| * Save this file, and log into Petunia. | * Save this file, and log into Petunia. | ||
| + | |||
| == Using Petunia == | == Using Petunia == | ||
| '''Petunia''' is the name for the '''Web Interface''' for interacting with the TPP tools. | '''Petunia''' is the name for the '''Web Interface''' for interacting with the TPP tools. | ||
| - | === Accessing Petunia (Windows / Cygwin) === | + | === Accessing Petunia (Windows) === |
| - | * To access Petunia open a Web Browser and refer it http://localhost:1441/tpp-bin/tpp_gui.pl | + | * To access Petunia open a Web Browser and refer it http://localhost/tpp-bin/tpp_gui.pl |
| ** If you have a Petunia icon entitled '''TPP Web Tools''' on the ''Desktop'' you can access the interface by clicking on the icon. | ** If you have a Petunia icon entitled '''TPP Web Tools''' on the ''Desktop'' you can access the interface by clicking on the icon. | ||
| ** You may also find Petunia in '''Start → Program Files → TPP → TPP Web Tools'''. | ** You may also find Petunia in '''Start → Program Files → TPP → TPP Web Tools'''. | ||
| Line 43: | Line 54: | ||
| [[Image:Petunia_login.jpg|thumb|right]] | [[Image:Petunia_login.jpg|thumb|right]] | ||
| * You should be presented with a '''Login''' page asking for a user name and password. The default login authentication: '''Username:''' ''guest'', '''Password:''' ''guest'' | * You should be presented with a '''Login''' page asking for a user name and password. The default login authentication: '''Username:''' ''guest'', '''Password:''' ''guest'' | ||
| - | ** If you have any problems at this point, you may want to consult the [[TPP:User_Documentation#Installation_Troubleshooting|Troubleshooting Guide]]. | ||
| <br style="clear:both;"/> | <br style="clear:both;"/> | ||
| [[Image:Petunia_home.jpg|thumb|right]] | [[Image:Petunia_home.jpg|thumb|right]] | ||
Current revision
Contents |
[edit]
First Step
[edit]
Installing the TPP on Windows
[edit]
Customizing Petunia
[edit]
How to create a new account
- Using Windows File Explorer (i.e. My Computer...), navigate to the location of the installation of the TPP tools, typically this is under C:\Inetpub\tpp-bin\.
- Locate the users folder, and navigate into it.
- On a new installation, you should see one directory, guest. This contains data for that account.
- Make a copy of this folder (i.e. 'Copy of guest'), and rename this new folder to whatever you want the new username to be. Make sure you do not use spaces or other non-standard characters.
- The new account is now ready; log in through Petunia with the 'guest' password.
- Once you log in, go to the Manage My Account tab in Petunia to change the password!.
[edit]
How to disable the 'guest' account
- Make sure you have other accounts active before deleting the guest account from your system.
- Using Windows File Explorer (i.e. My Computer...), navigate to the location of the installation of the TPP tools, typically this is under C:\Inetpub\tpp-bin\.
- Locate the users folder, and navigate into it.
- Delete (or rename) the directory named guest.
[edit]
How to change the location of the data files
Note: if using a removable or network drive, you will need to ensure that the drive is always mounted as the same letter.
- First, make sure that the Apache webserver is able to serve content from the new data folder.
- Find the httpd.conf file; typically under C:\Program Files\Apache Software Foundation\Apache2.2\conf\
- Make a copy of this file and keep it as a backup, in case you need to revert to it.
- Open the file in your favorite text editor (i.e. Wordpad), and scroll to near the end.
- Find the line that reads <Alias /ISB "C:/Inetpub/wwwroot/ISB">.
- Change the directory path within the quotes to the new location.
- Find the line that reads <Alias /schema "C:/Inetpub/wwwroot/schema">, and change as above.
- Finally, find the line that reads <Directory "C:/Inetpub/wwwroot">, and change as well.
- Please make note of the forward slashes and case-sensitivity when making these changes, and don't forget the quotes!
- Also, make sure you copy everything from the original location (i.e. everything under C:/Inetpub/wwwroot) to new new data directory.
- Find the line that reads <Alias /ISB "C:/Inetpub/wwwroot/ISB">.
- Save the modified file, and restart Apache for the changes to take effect.
- Second, modify the Petunia code to point to the new data location:
- You can usually find the Petunia code under C:\Inetpub\tpp-bin\tpp_gui.pl.
- Open this file with your favorite text editor, and modify the following 2 lines:
my $www_root    = "C:/Inetpub/wwwroot/";  # full path to web server root
my $data_dir    = "${www_root}ISB/data/";          # full path to data directory top-level
to reflect the new location. For example:
my $www_root    = "E:/Proteomics/wwwroot/";       # full path to web server root
my $data_dir    = "${www_root}Data/TPP_data/";     # full path to data directory top-level
- Save this file, and log into Petunia.
[edit]
Using Petunia
Petunia is the name for the Web Interface for interacting with the TPP tools.
[edit]
Accessing Petunia (Windows)
- To access Petunia open a Web Browser and refer it http://localhost/tpp-bin/tpp_gui.pl
- If you have a Petunia icon entitled TPP Web Tools on the Desktop you can access the interface by clicking on the icon.
- You may also find Petunia in Start → Program Files → TPP → TPP Web Tools.
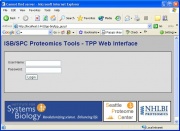
- You should be presented with a Login page asking for a user name and password. The default login authentication: Username: guest, Password: guest
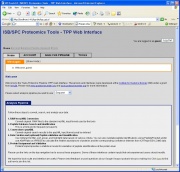
- If login was successful the next page will be a Welcome page.
[edit]
Next Step
[edit]
Example Data Analysis
[edit]
Author
original author: David Shteynberg


